| | Door repairs |  |
|
|
| Author | Message |
|---|
Michayos

Posts : 150
Join date : 2013-08-27
Age : 56
Location : Lockport, NY
| | Subject: Door repairs Sun Dec 15, 2013 10:32 am | |
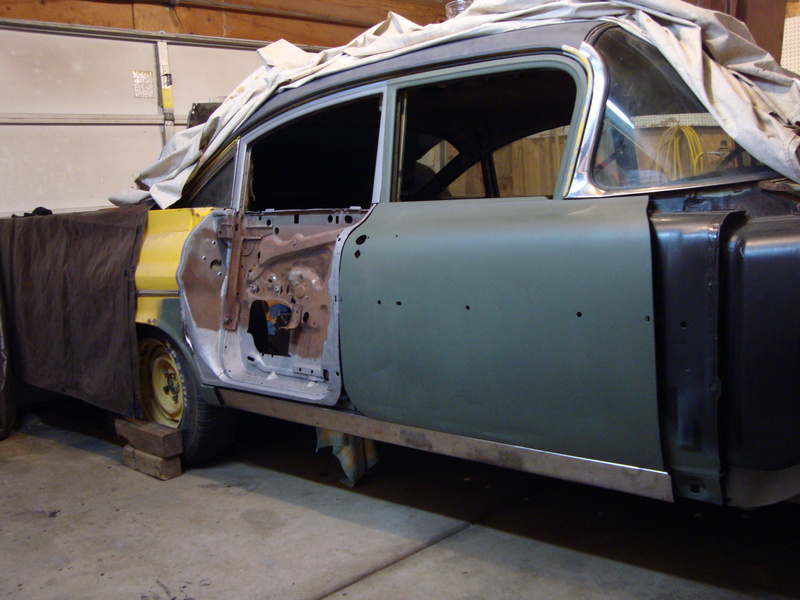
| Its too cold for painting so I decided to work on some of the more mobile parts that I can bring inside. First up are the doors... Here's the front door shells I got from Arizona off a 59 Biscayne. There's some minor surface rust in the usual areas but they are cleaning up nicely. The passeneger door was dinged up pretty good in shipping so I might replace the bottom half of the door skin. I thought the doors on Chevys and Pontiacs's were the same but there's a slight difference. The holes for the molding clips look bigger on the Chevy doors. 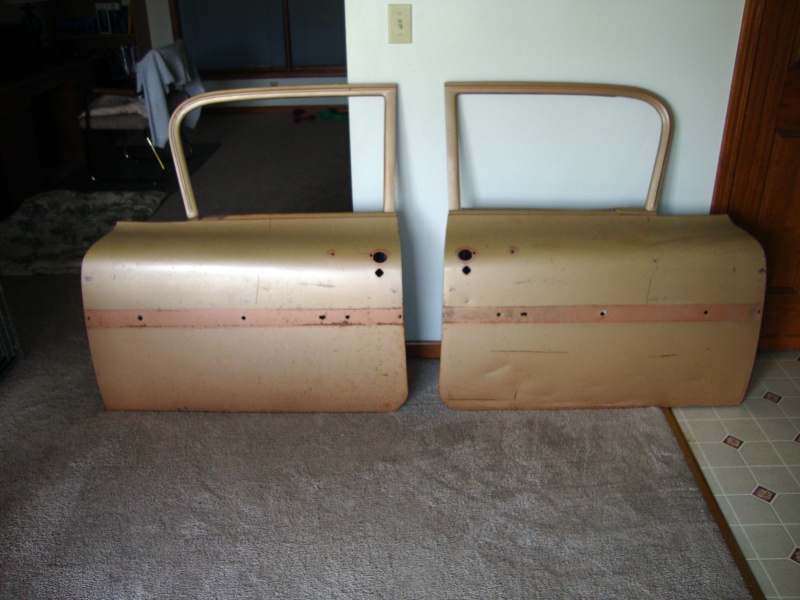  For now I'm concentrating on sandblasting all the parts for the passenger side. Since my garage now looks like a sand storm went through it, I'll do what I can for the other side too. | |
|
| | |
Michayos
Posts : 150
Join date : 2013-08-27
Age : 56
Location : Lockport, NY
| | Subject: Re: Door repairs Mon Dec 16, 2013 9:24 pm | |
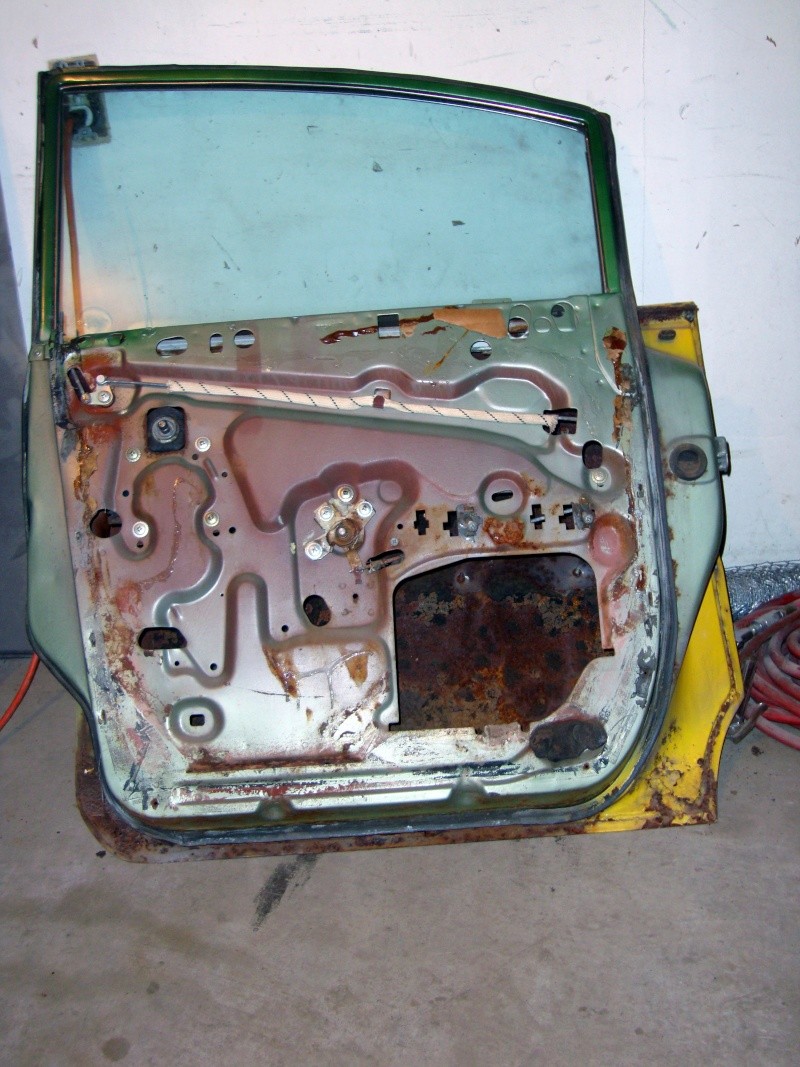
| Does anyone have a service manual for the 4 door sedans??? I can't for the life of me figure out how to get the glass out of the rear door. I don't want to chance damaging the glass while sandblasting so it must come out! Grrrrrrr. The front door cleaned up perfectly. But I guess it was colder in my garage than I thought because the moisture froze in the air lines! LOL   | |
|
| | |
CATBIRD
Posts : 307
Join date : 2008-07-03
Age : 80
Location : Levittown, Pa
| | Subject: Re: Door repairs Tue Dec 17, 2013 1:30 am | |
| Michael…..If you haven't done so already, lower the window and then remove the crank, door handle, arm rest, door upholstery card, and water deflector paper. It is easier to remove the glass if you also remove the inner metal trim around the window opening (called garnish molding.) The rear glass run channel ( the part that the glass slides up and down in) then needs to be removed. It's attached at the bottom with a nut that can be loosened through the large access hole in the inner door frame. The upper attaching screw is located on the end of the door frame above the latch. There are clips in the window opening frame that hold the upper part of the run channel in place. Carefully disengage the channel from these, and pull it up and inward to remove it.
If you look into the large access hole you can see the lower edge of the window and sash. The sash is attached to the "lower sash cam" with two screws. I don't know why they call it a cam, but it's the channel with the TWO regulator rollers in it. At any rate the rear screw can be reached through the large access hole, and the front screw can be removed through a small hole just below the door handle mechanism.
Once you've done all this, reach in and raise the lower sash enough to grab the glass at the top. Now the glass with its sash can be removed by lifting it up and inward. You may have to jiggle it some, but it should come out. By the way, "jiggle" is a highly technical shop term, to be used only by certified professional personnel. DO NOT TRY THIS AT HOME……John | |
|
| | |
Michayos
Posts : 150
Join date : 2013-08-27
Age : 56
Location : Lockport, NY
| | Subject: Re: Door repairs Tue Dec 17, 2013 8:25 am | |
| Thanks John! Somehow I figured you'd know... ;-)
Damn! I was so close... Do you know how many times I looked at that screw above the door latch wondering... what the *censored* do you do!?
I'll try again and let you know.
Just to clarify... The fuzzy U channel and the window should come out together but the metal window frame stays in place right? | |
|
| | |
Cat SS 59

Posts : 84
Join date : 2010-10-12
Age : 63
Location : Westmoreland, NH
| | Subject: Re: Door repairs Tue Dec 17, 2013 11:16 am | |
| Michael, I have a 1959 Body Shop Manual with pictures if it would help. Give me your fax number and I will send you copies. Jim | |
|
| | |
Michayos
Posts : 150
Join date : 2013-08-27
Age : 56
Location : Lockport, NY
| | Subject: Re: Door repairs Tue Dec 17, 2013 3:23 pm | |
| That would be greatly appreciated Jim! I emailed you my fax number. Let me know if you don't receive it... | |
|
| | |
Cat SS 59
Posts : 84
Join date : 2010-10-12
Age : 63
Location : Westmoreland, NH
| | Subject: Re: Door repairs Tue Dec 17, 2013 4:40 pm | |
| My email has changed and I can't seem to change it on my profile. Try sending me a PM. | |
|
| | |
CATBIRD
Posts : 307
Join date : 2008-07-03
Age : 80
Location : Levittown, Pa
| | Subject: Re: Door repairs Tue Dec 17, 2013 5:53 pm | |
| Michael…..no, the fuzzy "U" channel (called the rear glass run channel) comes out first so you have room for the window and its sash to clear the window frame. Just to be clear, the window glass is surrounded by a metal frame. That is referred to as the sash. The bottom sash is attached to the sash cam by two screws which must be removed to separate the the window from the regulator. The window frame is actually the metal opening for the window that is the upper part of the door……John
What I posted before is what the factory recommends as the method for removing the glass. If you find it difficult to do, you might want to remove the front glass run channel also. This is done by removing the screws at the front end (hinge side) of the door frame, and the clips in the upper frame. | |
|
| | |
Michayos
Posts : 150
Join date : 2013-08-27
Age : 56
Location : Lockport, NY
| | Subject: Re: Door repairs Tue Dec 17, 2013 7:43 pm | |
| | |
|
| | |
CATBIRD
Posts : 307
Join date : 2008-07-03
Age : 80
Location : Levittown, Pa
| | Subject: Re: Door repairs Wed Dec 18, 2013 10:12 am | |
| Michael…..opps, forgot about that. Only the hardtops and convertibles have the sash completely surrounding the glass for support. The sedans don't need it because they are supported by the entire window opening. I hope this didn't cause you any confusion. Be careful with that rear glass run channel. They can be repaired, but they're hard to find replacements. Looks like you will at least have to replace the lower part of the door skin. Good luck with it……John | |
|
| | |
Michayos
Posts : 150
Join date : 2013-08-27
Age : 56
Location : Lockport, NY
| | Subject: Re: Door repairs Wed Dec 18, 2013 10:51 am | |
| It's all good John. Your tips got me pointed in the right direction, and Jim's pictures gave me the final tips on getting it out.
Yeah, the bottom half of the door doesn't look so good. I'm tempted to replace the door as a whole. The other side isn't much better.
I'll decide what to do when I see just how bad it really is after sandblasting. | |
|
| | |
Michayos
Posts : 150
Join date : 2013-08-27
Age : 56
Location : Lockport, NY
| | Subject: Re: Door repairs Wed Jan 01, 2014 1:25 pm | |
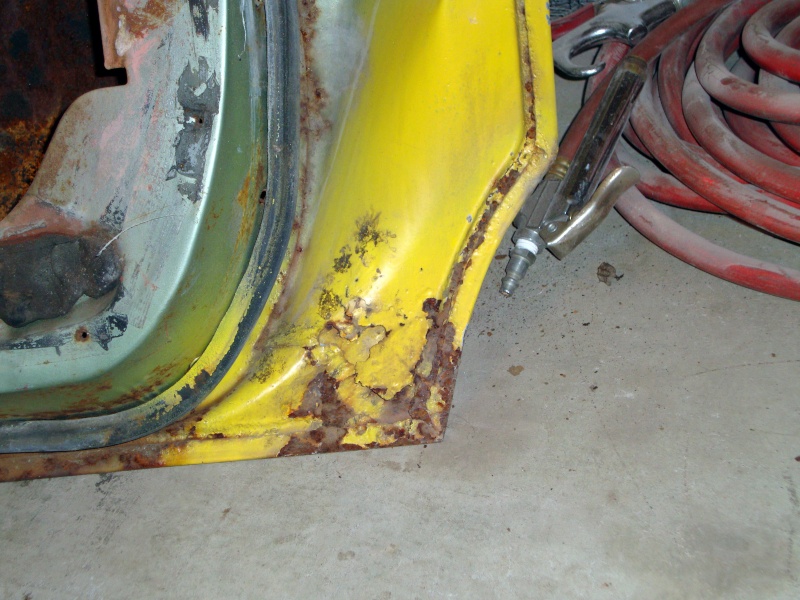
| Sand... sand... everywhere sand! All I need now is a small pool of water in my garage and I'll have the perfect indoor beach! ROFL I'm slowly plugging away at all the sandblasting. The rear passenger door is stripped down and sandblasted. John, as I expected you were right, I pretty much have to replace the bottom half of the door skin but there's also some structural repairs I need to do too. I guess its time to find out just how good my welding has gotten. I expected most of this but was hoping it wasn't so bad. The door skin repairs are going to be my biggest challenge. If I screw it up then I buy replacements, which is what I probably should just do now, but I'm stubborn and now's as good a time as any to see if my welding is good enough for this.  The door fin cleaned up very nicely  This is where the door handle mounts  And the bottom half of the door is a mess     | |
|
| | |
Michayos
Posts : 150
Join date : 2013-08-27
Age : 56
Location : Lockport, NY
| | Subject: Re: Door repairs Thu Jun 05, 2014 8:37 pm | |
| After our unusually long winter it's sooooo hard locking myself in the garage but I did manage to get some repairs done to the rear passenger door this week. This is where I left off last fall... and now to repair this mess 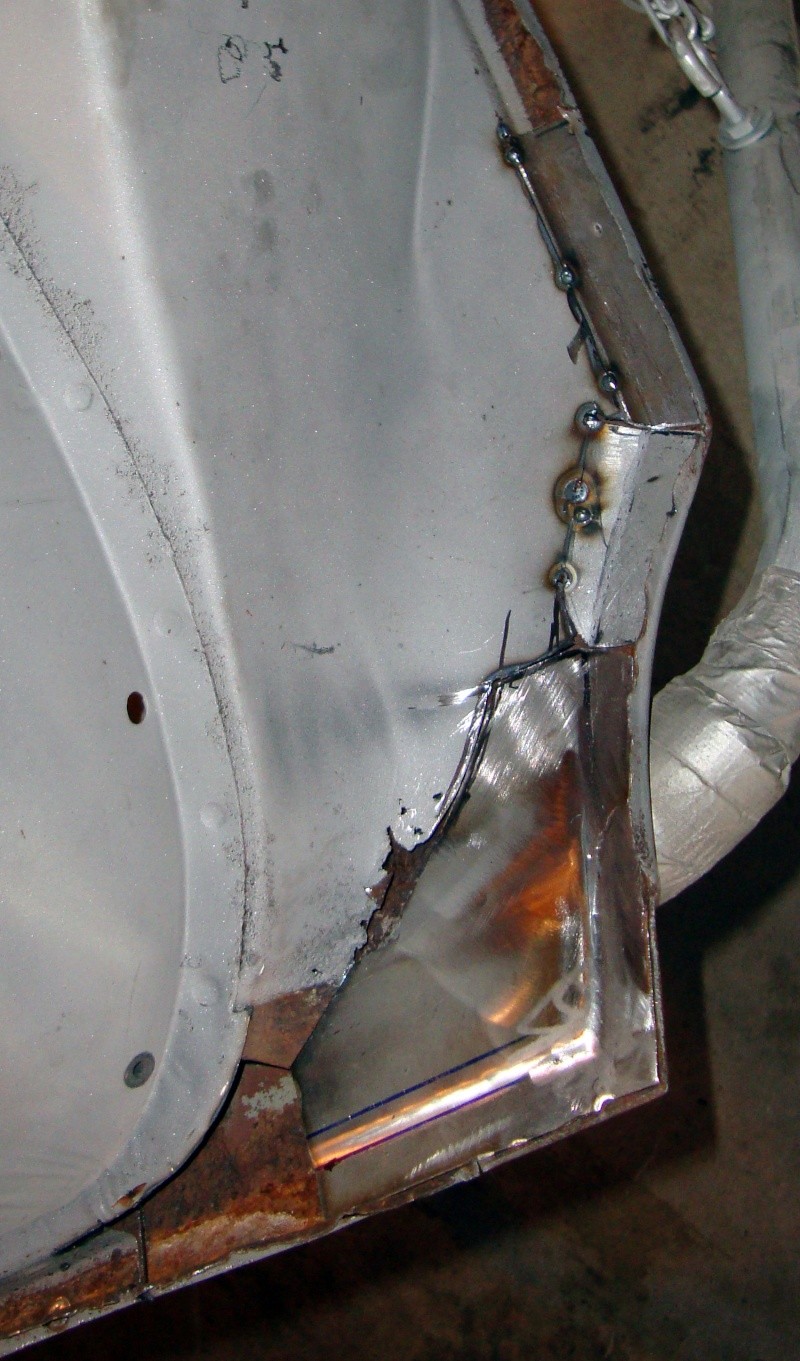   | |
|
| | |
Michayos
Posts : 150
Join date : 2013-08-27
Age : 56
Location : Lockport, NY
| | Subject: Re: Door repairs Tue Jun 10, 2014 7:47 pm | |
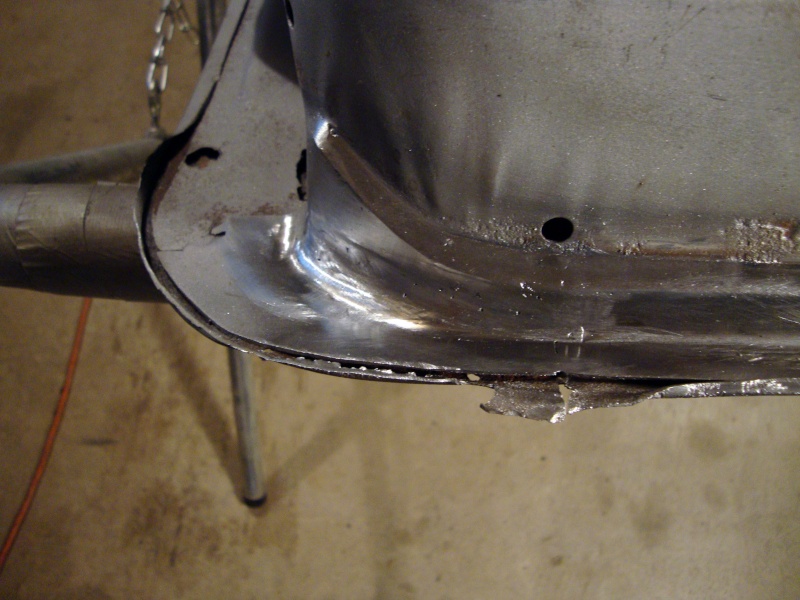
| Finishing off this corner was definitely a challenge but not really hard as much as it was time consuming. I've been doing this in two stages. One being the flat section the door skin is crimps onto, and the other the rounded edge of the bottom of the door. This piece looks small but I spent a whole night getting the curved section to line up just right because of the dual curves. It not only curves around the bottom of the door, but it curves out to meet the flat piece.   And picking up on the other corner where I left off last fall...  Next up, the long bottom edge... | |
|
| | |
Michayos
Posts : 150
Join date : 2013-08-27
Age : 56
Location : Lockport, NY
| | Subject: Re: Door repairs Fri Jul 04, 2014 9:54 am | |
| | |
|
| | |
Michayos
Posts : 150
Join date : 2013-08-27
Age : 56
Location : Lockport, NY
| | Subject: Re: Door repairs Sat Sep 19, 2015 9:24 am | |
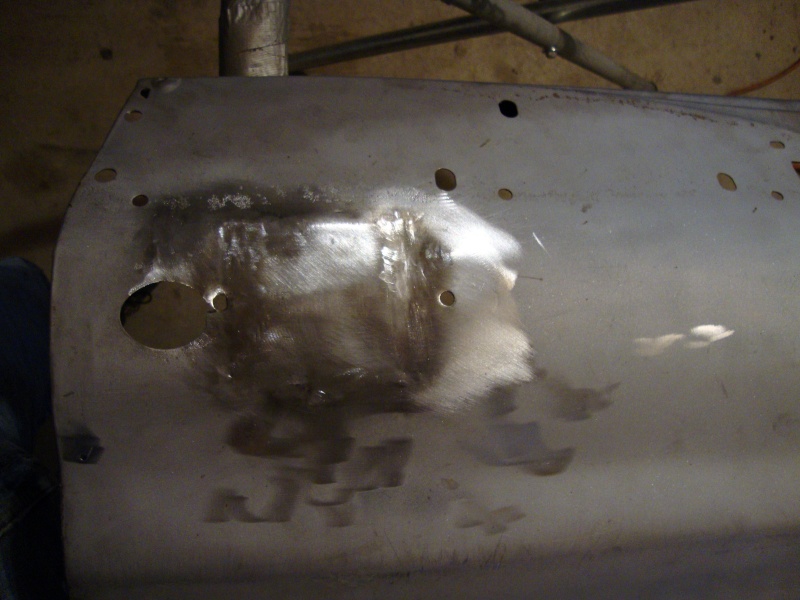
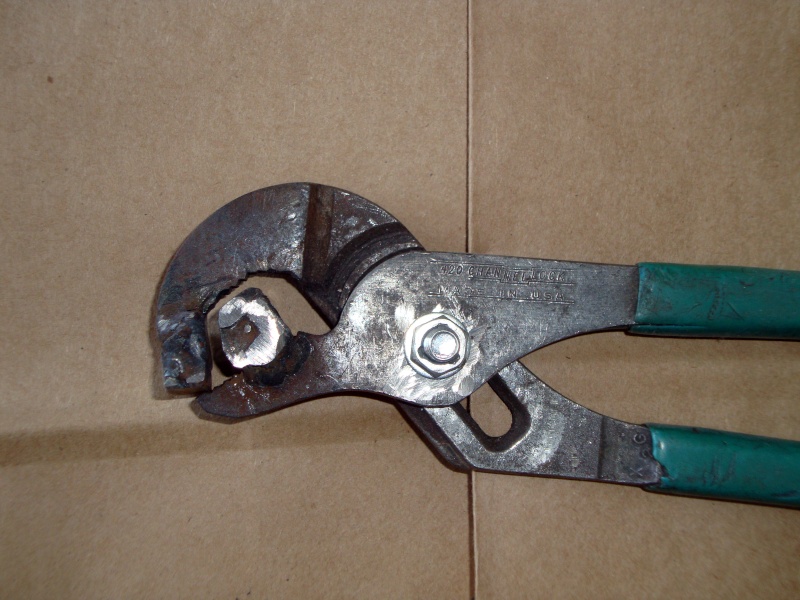
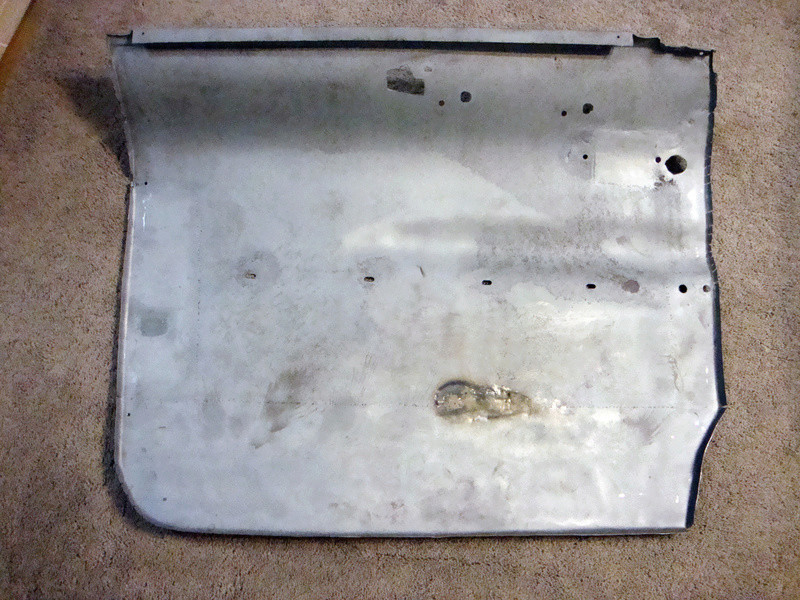
| The Chevy replacements for the front doors were still down to bare metal after sandblasting 2 winters ago. Surprisingly there's no surface rust starting yet. I've stored them with the other sandblasted parts in a spare bedroom with low humidity. :-) I've painted the outside with self etching primer. I will finish scraping off the old undercoating inside the doors later.   While I was at it I coated the inside of the fin off the rear passenger side door with POR-15 and used self etching primer on the outside. The clip on holders and nuts were soaked in Eastwood's "Fast Etch" which removes the rust and leaves a nice protective zinc coating behind.   Now back to that rear door skin. This one's going to be a bit of a challenge. Due to Father Time, rust, and who knows what else, the thickness of the metal on the door skin is less than 18 gauge and more than 20 gauge. I'm using 18 gauge sheet metal for replacements which means I have to blend the seams of the replacement pieces into the rest of the door. The bottom of the door skin has tons of pin holes and it's straight across. Hey, I can do this! :-) First to cut off the bottom and test fit the replacement panel.  Ok, now how do I weld all the way across this and not warp it? Start off by staggering a lot of spot welds across the seam pausing in between each one to let the heat dissipate. And of course it helps if you have a nice heat sink to help dissipate the heat. The copper plate dissipates the heat from the spot weld very fast and the angle iron behind it acts as the heat sink for the copper plate.   My girlfriend told me yesterday that I was neglecting her. I jokingly pointed at the car and said "How can that be when I've been here with her all day?" Needless to say she wasn't laughing! I'm off to the florist this morning... | |
|
| | |
59 Sport Coupe

Posts : 213
Join date : 2012-04-15
Age : 56
Location : Europe ( FRANCE )
| | Subject: Re: Door repairs Sun Sep 20, 2015 3:45 pm | |
| Good job  My girlfriend told me yesterday that I was neglecting her. I jokingly pointed at the car and said "How can that be when I've been here with her all day?" Needless to say she wasn't laughing! My girlfriend told me yesterday that I was neglecting her. I jokingly pointed at the car and said "How can that be when I've been here with her all day?" Needless to say she wasn't laughing!
I'm off to the florist this morning...
strange ... I have the same problem here  | |
|
| | |
Michayos
Posts : 150
Join date : 2013-08-27
Age : 56
Location : Lockport, NY
| |
| | |
Michayos
Posts : 150
Join date : 2013-08-27
Age : 56
Location : Lockport, NY
| | Subject: Re: Door repairs Tue Apr 19, 2016 8:32 pm | |
| | |
|
| | |
Michayos
Posts : 150
Join date : 2013-08-27
Age : 56
Location : Lockport, NY
| | Subject: Re: Door repairs Sun Oct 09, 2016 8:40 pm | |
| | |
|
| | |
mus098

Posts : 6
Join date : 2016-10-08
Age : 64
Location : Thonotosassa,Florida
| | Subject: Re: Door repairs Tue Oct 11, 2016 6:42 pm | |
| | |
|
| | |
Sponsored content
| | Subject: Re: Door repairs | |
| |
|
| | |
| | Door repairs | |
|