| | Interior Floor replacement |  |
|
|
| Author | Message |
|---|
Michayos

Posts : 150
Join date : 2013-08-27
Age : 56
Location : Lockport, NY
| | Subject: Interior Floor replacement Fri Sep 06, 2013 10:04 pm | |
| | |
|
| | |
Michayos
Posts : 150
Join date : 2013-08-27
Age : 56
Location : Lockport, NY
| | Subject: Re: Interior Floor replacement Fri Sep 06, 2013 10:09 pm | |
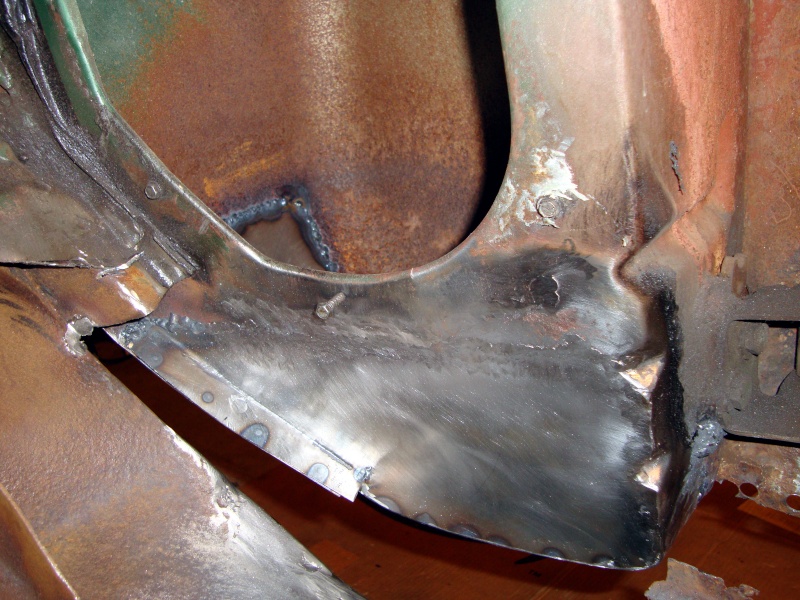
| And now that I've got all that done it's time to fit the toe panel replacement that I fabricated to fit the section I cut out here...  And once that's sitting in place I can finish fabricating this replacement... There's just not enough left to tell how to make this peice without sitting the toe panel in place first. :-( 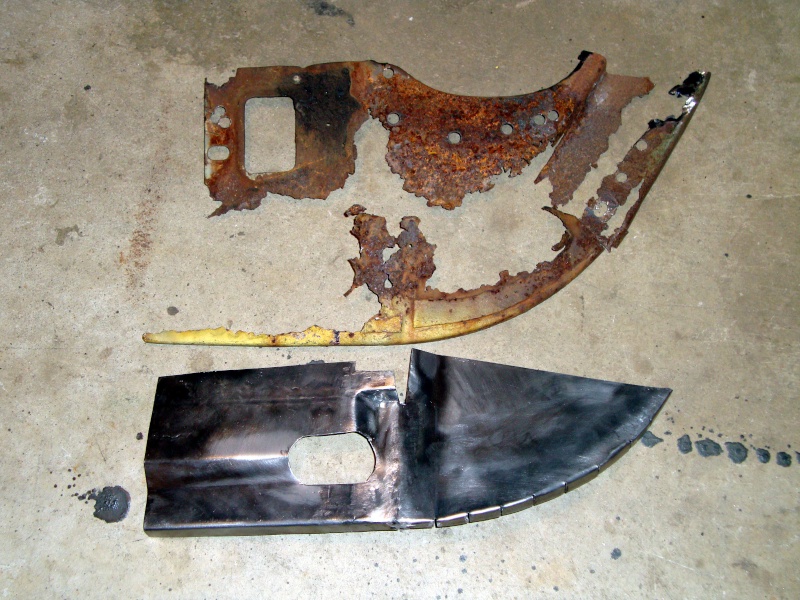
Last edited by Michayos on Wed Oct 30, 2013 10:09 pm; edited 2 times in total | |
|
| | |
59 Sport Coupe

Posts : 213
Join date : 2012-04-15
Age : 56
Location : Europe ( FRANCE )
| | Subject: Re: Interior Floor replacement Wed Sep 18, 2013 4:02 am | |
| It is an impressive work. Congratulations for this reconstruction. I hope to not have to do the same job on my car. | |
|
| | |
Michayos
Posts : 150
Join date : 2013-08-27
Age : 56
Location : Lockport, NY
| | Subject: Re: Interior Floor replacement Sun Oct 13, 2013 8:19 am | |
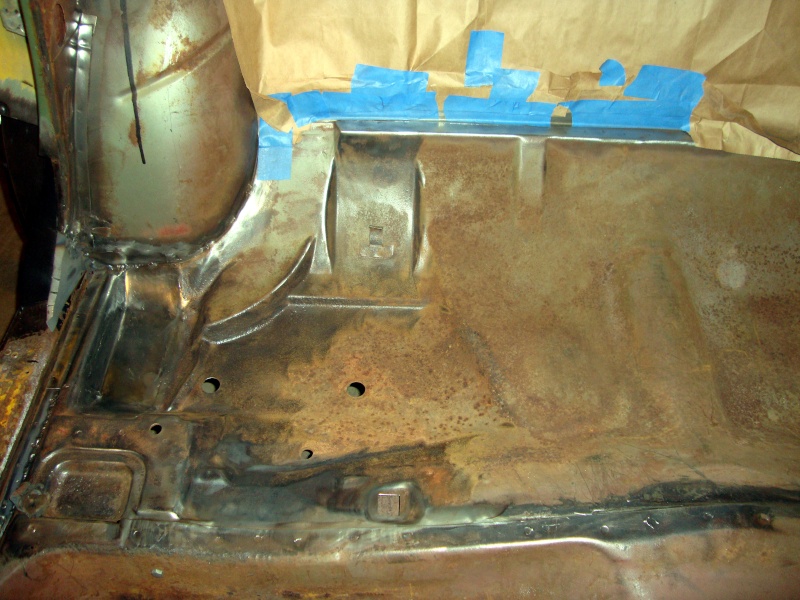
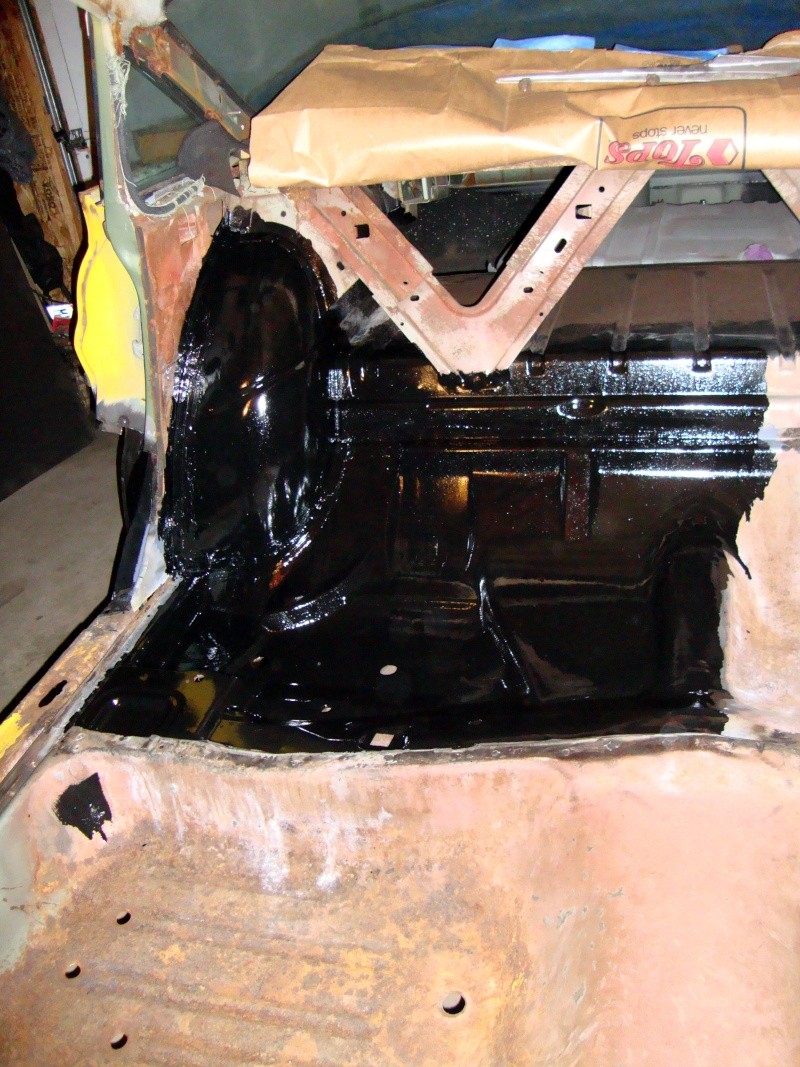
| Thanks Coupe! I suppose for my skill level it's decent work. I've become very anal about doing things right the first time. I try to tell myself that its ok if some of these peices aren't exactly factory correct because its unlikely anyone but me will ever know. I only have 2 hours or so each night to work on the car and each night starts off with me trying to remember where I left off the night before. Hehe I've finished up this section for now. Everything is either primed with self etching primer or POR-15. OK, I see a few of you resto guru's cringing at the mention of POR-15 but I've had excellent results with it so far. Most of the parts in black are covered with POR-15 and I've done my entire trunk inside and out with it. This is the underlying supports to the toe kick panel. The peice that was all but gone in the previous post is on the right side. The light gray is weldable self etching primer for the spot welds on the toe board that comes next.   Here is the toe board in place. I didn't weld the left side so I can adjust it when I eventually put in the floor pan.  And finally, the bottom of the...danged if I know the technical term for this. The black is POR-15 and the light gray is more weldable self etching primer for when the rocker panels are welded in next year (I HOPE!)  
Last edited by Michayos on Wed Oct 30, 2013 9:21 pm; edited 1 time in total | |
|
| | |
Michayos
Posts : 150
Join date : 2013-08-27
Age : 56
Location : Lockport, NY
| | Subject: Re: Interior Floor replacement Wed Oct 30, 2013 8:41 pm | |
| | |
|
| | |
Michayos
Posts : 150
Join date : 2013-08-27
Age : 56
Location : Lockport, NY
| | Subject: Re: Interior Floor replacement Sun Nov 03, 2013 5:27 pm | |
| And now for the nitty gritty... where to begin...? I'm taking every precaution I can to keep the center post between the doors from moving. Time will tell if I succeeded. Here's the driver's side floor now...  It may not look bad but look closer... The seat mounts and supports are about gone...  and there are holes all over like this...  Here is what is left of the passenger side floor.  And lastly the rear heat ducts sitting in place... 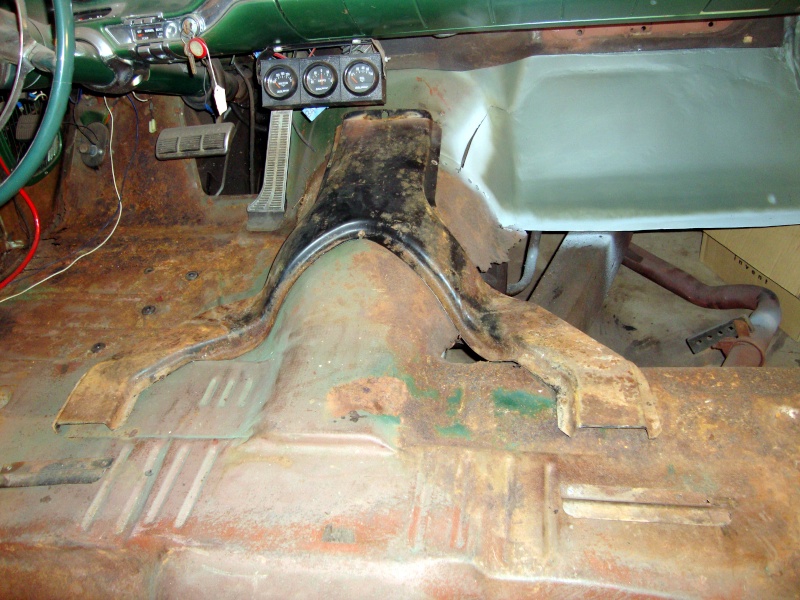 So where to start right? Let's start by securing that center post without making it impossible to work on things. I used 10 gauge angle iron that's 1" on each side. 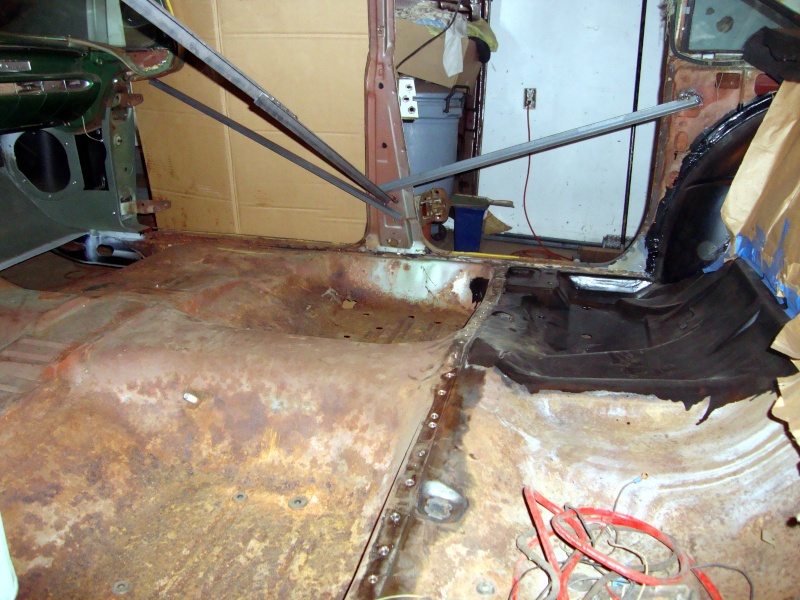 Now lets get the passenger side up...up...UP! I lifted it slowly going back and forth between the front and rear until I got it to here to minimize any twisting that might occur while jacking it up. Ideally I would have had another floor jack with an extra pair of hands so we could jack the front and rear evenly.  I'm taking a break now to feed my face then its time to start cutting away the old floor. Gawd I hope my bracing holds...wish me luck! | |
|
| | |
Michayos
Posts : 150
Join date : 2013-08-27
Age : 56
Location : Lockport, NY
| | Subject: Re: Interior Floor replacement Sun Nov 03, 2013 8:56 pm | |
| I've cut out the passenger side floor except for the cross brace/support that goes all the way across the floor as one peice. Actually I didn't know it went all the way across until I started cutting out the floor and couldn't figure out what was still holding it in! LOL  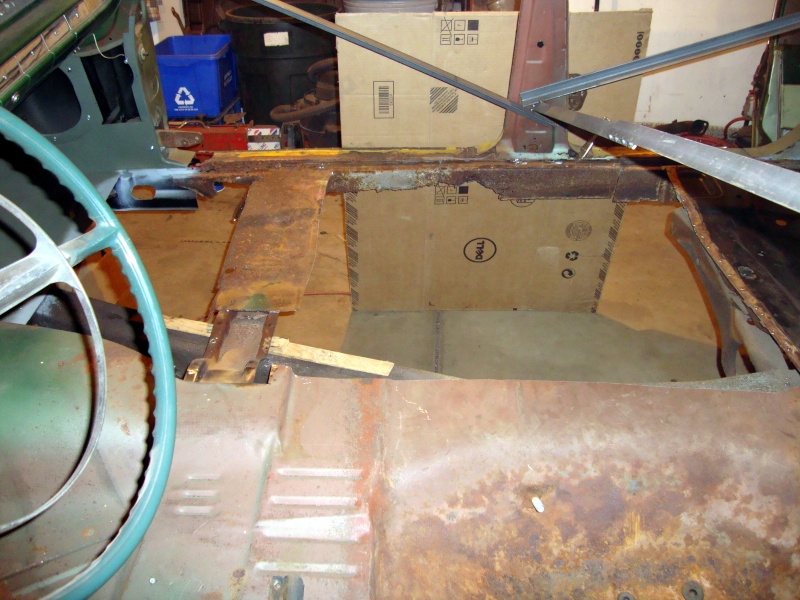 The good news is it looks like the braces I welded in to hold the center post are holding. The bad news is that cross support complicates things. I wanted to slip the new floor pan in underneath the old rocker panels. But now I'm thinking I should replace the rocker panels before I cut that support so I have a better chance of retaining the right height for the floor. The floor pan sets on a ledge created by the inner rocker panel. So I should be able to sit the new floor pan in on the ledge and then weld in the new replament for the floor supports. Here you can see the ledge where the cross support meets the inner rocker panel.  | |
|
| | |
CATBIRD
Posts : 307
Join date : 2008-07-03
Age : 80
Location : Levittown, Pa
| | Subject: Re: Interior Floor replacement Sun Nov 03, 2013 11:37 pm | |
| Michael…..I think that you definitely need to rebuild the inner and outer rockers first. You already have the "B" pillar braced from side to side so that it can't collapse inward. Once the rockers are rebuilt, and the bottom of the pillar reattached, then you can remove that floor support. Are you sure that support goes all the way across? It looks like the #2 replacement support that you have, which doesn't go all the way. Put the car back down on the ground and support the body just in front of and just behind where it joins to the rockers. Remove and replace one at a time. I'd start with the outer, since it is almost non existent, and you can get reproductions. I've never seen inners, so I think you will have to fabricate them. From what I've seen of your skills, you shouldn't have any problem……John | |
|
| | |
Michayos
Posts : 150
Join date : 2013-08-27
Age : 56
Location : Lockport, NY
| | Subject: Re: Interior Floor replacement Mon Nov 04, 2013 10:08 am | |
| Ahhh, so the center post is called the "B pillar". Thanks for the info. :-) I don't know about my skills...but thanks for the compliment. I have both inner "repair" panels from JCWhitney that were bought a few years back. Good quality 16 gauge steel. But they are repair panels not replacement panels. They are missing the top 3/4 inch lip that goes up from the ledge that the floor pan sits on. I can fix that. As you said... I got skilz! LOL I also have both outer rocker panels which are 18 gauge steel like the origonals. There's also a center panel that's made from 16 gauge steel. I'll have to fabricate these but they will be pretty easy. If I can find a spot where I can get a good picture of the cross section I'll post a picture. After thinking about it you're right but I'm dreading droping the car back to the ground. With half the floor gone there's less support to keep it from twisting or otherwise tweaking the body while I lower it. Just curious but why do you think I need additional support on the body while working on the rocker panels? Thankfully the frame is solid due a generous coating of oil from leaky rear main seal. There's 2 body mounts just behind the area I cut out, and 2 more under the toe panel/firewall in front. Once the tires are back on the ground the body should be level and well supported by the body mounts attaching it to the frame... right? Yes, I'm sure about that support going all the way across as one peice. I drilled out the spot welds and peeled back part of the floor to confirm it as shown below. I guess the new replacement support is only a partial replacement. You can see where the new support ends the origonal support continues up and over the driveshaft to the other side.  | |
|
| | |
CATBIRD
Posts : 307
Join date : 2008-07-03
Age : 80
Location : Levittown, Pa
| | Subject: Re: Interior Floor replacement Tue Nov 05, 2013 12:47 am | |
| Michael…..I went out and looked at the underside of my car today, and you are right, that support goes all the way from rocker to rocker. I guess you'll have to butt weld the new pieces to the old, and then put a reinforcement plate across the seam. More spot weld cutting. My guess is that they don't reproduce the entire support because water doesn't accumulate much on the vertical pieces.
My concern with supporting the body, is that you don't want any movement of the parts that are not being replaced while removing the rockers. If the front section (cowl) moves closer to, or farther away from the rear section (quarter panel,) you are going to have fitment and/or gap problems with the doors. It looks like you have already removed the body mount in the seat area. The only thing that now holds the opening dimension is the roof and your braces.
There are many names that are used to describe that piece. I call it the B pillar, as opposed to the A pillar which is holding up the roof at the front, or the C pillar which is at the rear. I guess station wagons also have a D pillar. Sometimes they are referred to as hinge pillars and latch pillars. In the case of a four door car the B pillar is both latch and hinge. Hardtops are often caller pillarless coupes or sedans, but they still have a B pillar, just not above the belt-line. Another piece of information from a vast cesspool of useless knowledge……John | |
|
| | |
Michayos
Posts : 150
Join date : 2013-08-27
Age : 56
Location : Lockport, NY
| | Subject: Re: Interior Floor replacement Tue Nov 05, 2013 9:19 am | |
| John, I wouldn't call all that uselss info! It's great to learn these things and now I can use the proper terms, or at least terms someone besides me understands!  The replacement support is actually flanged on the side near the drive shaft. You can kinda see the flange in my last picture. So if I cut the old support carefully the overlapping flange should provide plenty of added support when welded properly from top and bottom. Honestly, I don't think the body is going anywhere but maybe you know something I've missed? I'm certainly no expert at this... All the body mounts are still in place. The area I've cut out is between 2 sets of body mounts that have 50+ years of rust helping to keep them from moving. In front there are 2 body mounts under the firewall/cowl, and there are 2 more body mounts under the front edge of where the rear seat would be. I didn't see any body mounts under the floor pan that I cut out. Are there supposed to be body mounts under the main floor pan? I "think" the angle iron I welded in across the door openings should add support to help prevent body movement or is that wishful thinking on my part? The front of the rocker panels are gone where it meets the bottom of pillar A. I think the second picture in my origonal post shows where I rebuilt the bottom of the door jamb on pillar A where it meets the rocker panel. You can see the gap in that picture. Before I jacked up the car I put a peice of masking tape across that gap. My logic behind this was that if the bottom of the car spread while jacking the tape should have been pulled loose. If the bottom of the car collapsed inward there should have been a hump in the tape from being pushed together. Neither happened. That doesn't mean the body couldn't twist while jacking but I think that peice of tape would still have shown some signs of movement. If the body moved while jacking it was minimal. But then again, a 1/32nd of an inch of movement is all it takes to totally screw up the door alignment. Do you think I should put the doors back on to ensure the body hasn't moved significantly before I put in the new rocker panels? | |
|
| | |
CATBIRD
Posts : 307
Join date : 2008-07-03
Age : 80
Location : Levittown, Pa
| | Subject: Re: Interior Floor replacement Wed Nov 13, 2013 12:53 am | |
| Michael…..You are right, you don't have a body mount in that area of the floor that you already cut out. I was thinking of mine, which has a bracket welded to the frame for a body mount just behind the front seat. That's what the large hole near the end of your support #3 is for. But that is only for convertibles. My concern was that these cars used an X frame, so there is little strength out near the sides, except for the rockers. That's why the rockers have that middle piece. Cars with perimeter frames generally have only an inner and outer rocker. Anyway, I see that you have already cut out the rockers, so I hope that all goes well……John | |
|
| | |
Michayos
Posts : 150
Join date : 2013-08-27
Age : 56
Location : Lockport, NY
| | Subject: Re: Interior Floor replacement Sun Nov 17, 2013 8:54 am | |
| Yeah, I took a leap of faith in those braces I welded in and pulled the rocker panel on the passenger side. There was a good 2 inch gap in the front where it joins the bottom of pillar A so if it was going to move it probably already did and I'll have to deal with it. I'll say this though, the driver's side doors open and close easily without binding so that's a good sign. | |
|
| | |
Michayos
Posts : 150
Join date : 2013-08-27
Age : 56
Location : Lockport, NY
| | Subject: Re: Interior Floor replacement Wed Jan 01, 2014 1:00 pm | |
| Figured I may as well sandblast the rear heat duct while everything in my garage was already covered in sand... 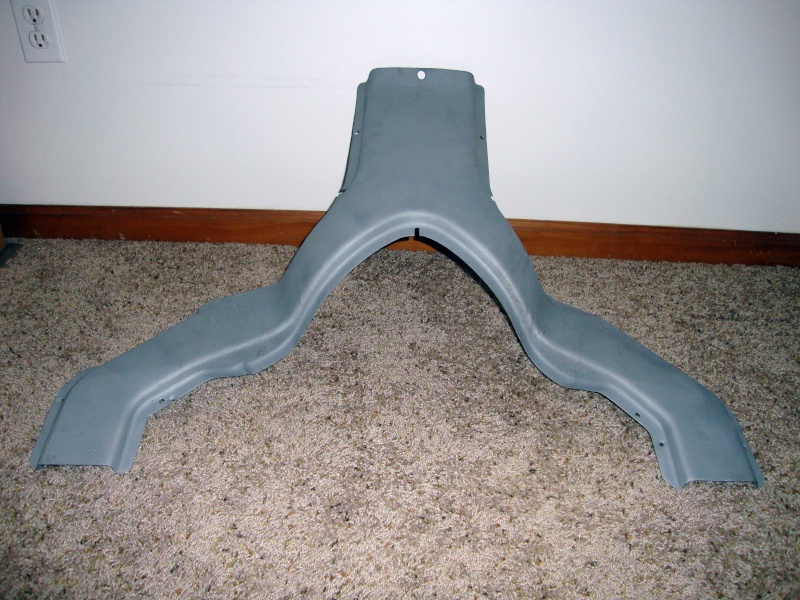 | |
|
| | |
Michayos
Posts : 150
Join date : 2013-08-27
Age : 56
Location : Lockport, NY
| | Subject: Re: Interior Floor replacement Thu May 15, 2014 7:53 pm | |
| | |
|
| | |
starchief_59
Admin

Posts : 1883
Join date : 2008-05-22
Age : 37
Location : Canyon Lake, Texas
| | Subject: Re: Interior Floor replacement Fri Dec 05, 2014 12:15 pm | |
| Wow, you are a brave man! | |
|
| | |
Michayos
Posts : 150
Join date : 2013-08-27
Age : 56
Location : Lockport, NY
| | Subject: Re: Interior Floor replacement Sun Dec 07, 2014 6:24 pm | |
| I think the jury is still out on whether I was brave or a dumbass for doing this! LOL
My job became very demanding of my time this past May and has remained so ever since so I haven't gotten much of anything done in the past 6 months. Hopefully by spring I should be able to get back at it. | |
|
| | |
Michayos
Posts : 150
Join date : 2013-08-27
Age : 56
Location : Lockport, NY
| |
| | |
Michayos
Posts : 150
Join date : 2013-08-27
Age : 56
Location : Lockport, NY
| | Subject: Re: Interior Floor replacement Wed Sep 09, 2015 8:50 pm | |
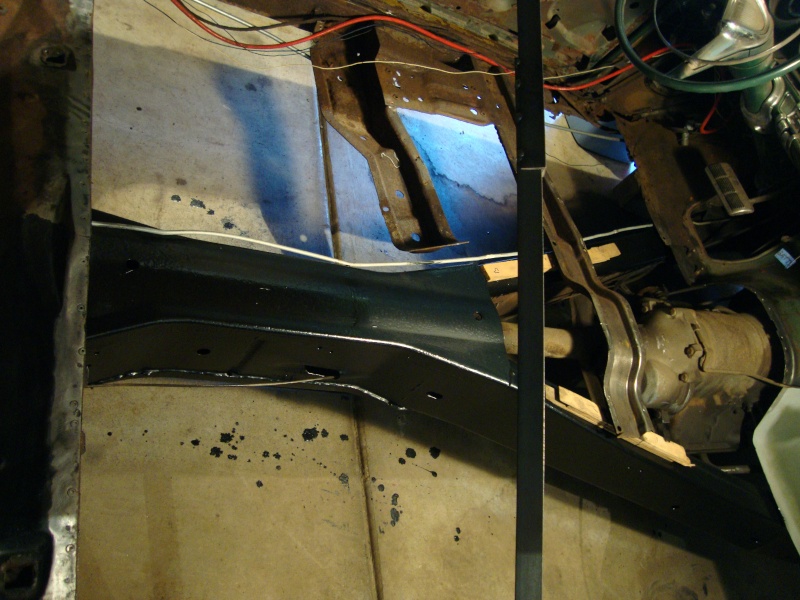
| So I've jacked the passenger side up about 15 inches to make room to slide the new floor pan underneath the door post and into place. It actually went pretty well and I did it by myself. I laid down a lot of blankets and cardboard to protect the painted frame and allow the new floor pan to slide in. Unfortunately I got so involved in putting in the new floor pan that I forgot to take pictures as I was working. Since I still have the driver's side to repair and a lot of other related parts to work on, the floor pan is just sitting in place but it gave me a good feeling to see new progress made on the car after sitting untouched for many months. A lot was on hold until I could get the floor pan in so next step is to get the car down off the jack stands so the body sits naturally and isn't flexed or twisted. Then on to the rocker panels on this side... Oh Joy!!! :-)   Lastly here is a side view showing where the rear floor support will mount onto the inner rocker panel 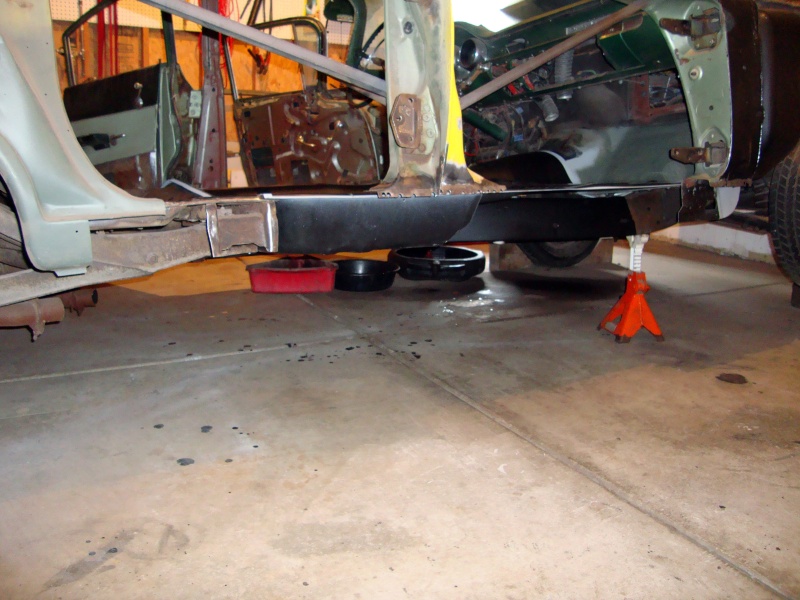 | |
|
| | |
Sponsored content
| | Subject: Re: Interior Floor replacement | |
| |
|
| | |
| | Interior Floor replacement | |
|